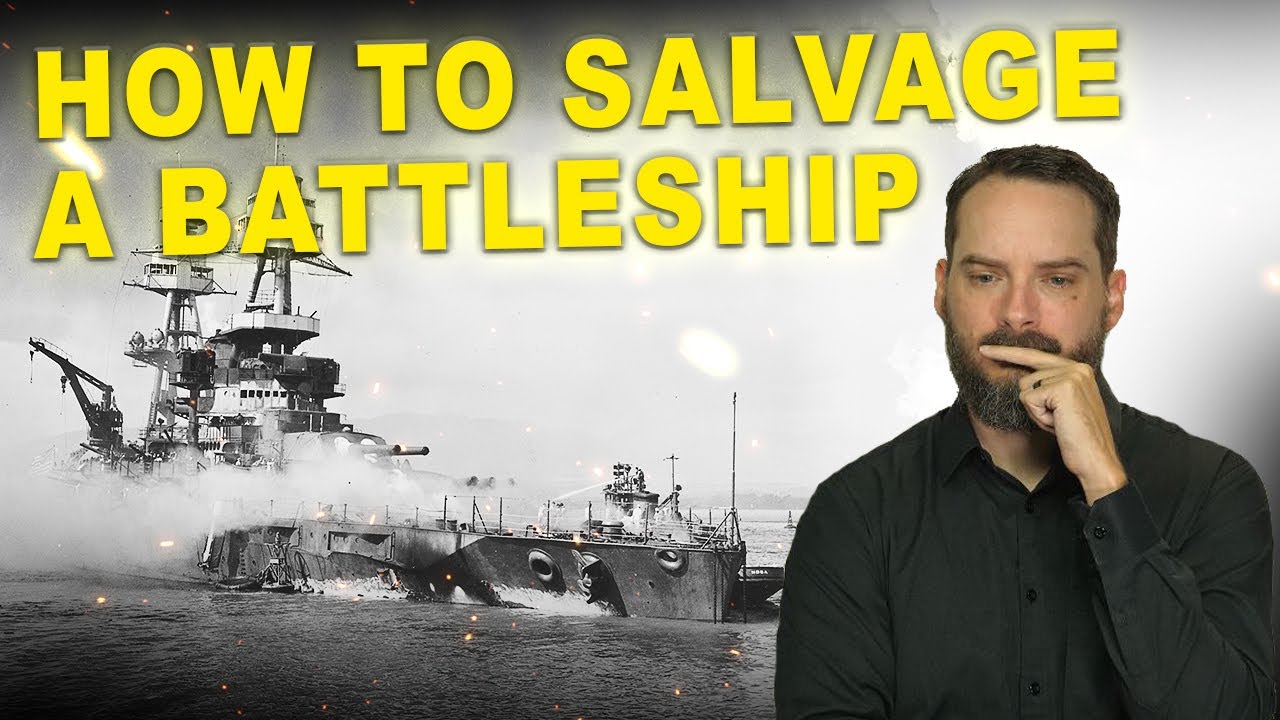
A Failed Attack- What Happened to the Ships at Pearl Harbor?
 “Yesterday, December 7, 1941 – a date which will live in infamy – the United States of America was suddenly and deliberately attacked by the naval and air forces of the Empire of Japan.”
This speech, delivered to Congress by President Franklin D. Roosevelt, is one of the most famous of the 20th century, and marked the official entrance of the United States into the Second World War. That conflict would end four years later in total Allied victory – though at the cost of some 85 million lives – nearly 3% of the world’s population. Today, the attack on Pearl Harbour is seared into the American consciousness alongside other national traumas like 9/11, and each year millions of tourists travel to Hawaii to visit the rusting, oil-weeping wreck of the USS Arizona. But while the general events of that day are familiar to many, what is less familiar is what exactly provoked Japan to do this, did Japan actually accomplish anything significant in the attack, and, on that note, what happened to each of the ships after?
As for the attack itself, this was the brainchild of Japanese Admiral Isoruku Yamamoto, who began planning the operation in June of 1941. A rather curious move for Japan to “wake the sleeping giant” as it were, it turns out the Japanese had little choice given their expansion goals and thanks in large part to previous moves by the United States to try to counter these.
Going back a bit, the Japanese aggression into the likes of China and French Indochina and the atrocities the Japanese committed in those regions, see our 2 hour documentary Swept Under the Rug: The Truth About the Japanese Holocaust, had seen the U.S., despite supposedly not wanting to be involved in foreign matters, nonetheless spearhead a series of progressively more harsh embargoes on Japan, ultimately cutting Japan off from needed supplies of oil, iron, rubber, steel, etc. For reference here at the time, 94% of Japan’s oil supplies were imported, and about 80% of that coming from the United States. After the embargo, it was noted by officials within the Imperial Japanese Navy that at that point they had perhaps as little as 6 months of campaigning before their ships would be dead in the water from lack of needed fuel. At that point forcing Japan to concede to whatever demands the U.S. wanted to place on them to lift the embargo.
They, thus, had three choices. First, negotiate a treaty with the U.S. to get them to lift the embargo. Second, try a second attack after their previous failed against the Soviets to capture those regions to get the resources they needed (and in this one support their ally in Germany). Or, third, attack South, but into certain regions that were more or less protected by the U.S., and thus in their view would likely see the U.S. declare war on them as a result.
As for option #1 of negotiating a treaty with the U.S. to resolve this, they actually tried exceptionally hard at this leading all the way up to mere hours before attacking Pearl Harbor. However, no such deal could be reached. That said, they did get pretty far along here, with Japan noting they would agree to withdraw from French Indochina and not attack any regions of Southeast Asia, so long as all aid to China was lifted from Britain, the U.S., and the Netherlands, and sanctions against Japan were likewise lifted. In essence, Japan was willing to give up most of their expansion plans and territories, but wanted to keep what they had captured of China and make war efforts there a little easier for themselves. The U.S., however, rejected this proposal, requiring all Japan had offered, plus also that Japan would withdraw from China and sign non-aggression pacts with the various Pacific states. Essentially, the U.S. stating, “Retreat back into your own country and abandon all plans of a true Japanese Empire and self sufficiency, as well as abandon plans to liberate Asia from Western influence like ourselves.” In so doing, this would also once again make Japan subservient to the U.S. and other nations because of the needed industrial supplies from them that Japan had no other access to.
As you can imagine, given the U.S. wasn’t really conceding literally anything, this was a non-starter for the Japanese leaders. Something that it seems is exactly what the U.S. officials were hoping for- to provoke Japan into conflict and thus, hopefully allow the U.S. to enter the war against Japan’s supposed but not really ally in Germany.
As for option #2 of attacking North against the Soviets, again, this was deemed too risky given they had no real way to counter the Soviet tanks and, as mentioned, had been defeated so resoundingly there on this front in their previous attempt.
This left option #3: before their oil and other supplies ran out, expand south into the Dutch East Indies, British Malaya, the Philippeans, and elsewhere to acquire the resources they needed while also accomplishing the goal of beginning to establish the Japanese Empire and liberating these regions from Western influence.
The problem here, again, was that to do so, they were convinced would cause the U.S. to declare war on them, with Japan then in a rather precarious position of not yet being fortified in the regions they were planning on taking right when the U.S.’s Pacific Fleet would presumably quickly attack.
Or, at least, they assumed they would. As you might expect given wide support for isolationism at the time in the U.S., historians debate whether the U.S. actually would have or not had Japan just gone ahead and done it without attacking the U.S. directly.
On all this, President Roosevelt explicitly stated the U.S. would not have… except he also believed that over the course of their activities in the region, the Japanese would make a mistake that he could leverage to drag the U.S. into war with Japan, and then his real goal- war with Germany. As noted by Pacific Fleet Admiral James O. Richardson when he asked Roosevelt if the U.S. would be going to war with Japan. He states Roosevelt responded, “if the Japanese attacked Thailand, or the Kra Peninsula, or the Dutch East Indies we would not enter the war, that if they even attacked the Philippines (note here, the Philippines at the time were an American protectorate) he doubted whether we would enter the war, but that [the Japanese] could not always avoid making mistakes and that as the war continued and that area of operations expanded sooner or later they would make a mistake and we would enter the war.”
Thus, if true, had the Japanese just went ahead and pushed south without directly involving the U.S., this is yet another point in WWII, much like when the Germans didn’t let the Soviets join the Tripartite Pact when the Soviets made overtures that they wanted to join up, where things may have gone extremely differently both in the war in Europe and the Pacific had one decision been different.
But, rightly or wrongly, the Japanese were convinced the U.S. would declare war on them the second they attacked the Philippines and other nations in the region. Something they had to do before they ran out of oil and other supplies because of U.S. embargoes against Japan.
So what to do about it, especially when they knew they couldn’t win a war against the United States?
How about sink the Pacific Fleet in a surprise attack, thus temporarily crippling the U.S.’ ability to retaliate while Japan simultaneously performed their own little Blitzkrieg, taking every nation they needed for the supplies and self sufficiency they wanted. They then would dig themselves in, such that it would require a massive effort by the United State to get them out. Something they knew the U.S. could do, but Japanese leaders felt that the U.S. would have no interest in such an effort given their general aversion to conflicts so far away. At that point, now from a much stronger negotiating position, and dealing with a nation that wouldn’t really want to continue the war, the Japanese could simply negotiate a truce with the United States that favored Japanese interests.
It’s fool-proof!!!!
Except not… Perhaps not adequately understanding American culture, and the classic modern day “These colors don’t run” type attitudes, while they had hoped the attack at Pearl Harbor would drive the U.S. citizens to even more advocate for isolating and withdrawing from these conflicts so far away, in reality their attack had more or less completely gotten rid of the American apathy towards the wars happening in the world at the time, undoing the isolationism that the U.S. had embraced post WWI. On top of this, because of the attack, which was perceived publicly as unprovoked even though the reality was Roosevelt and co. had been doing everything in their power to provoke Japan, the U.S. populace now had zero interest in negotiating a treaty with Japan. The American people wanted those deaths and the supposed unprovoked attack avenged, and weren’t going to stop until Japan was crushed.
Not all of the Japanese military leaders had been so deluded, however. For example, the aforementioned Marshal Admiral Isoroku Yamamoto, in charge of the entire combined Japanese fleet, was not shy about his opposition to the original Japanese signing of the Tripartite Pact because of it not so subtly being directed at the United States. He stated of this on October 14, 1940, “To fight the United States is like fighting the whole world. But it has been decided. So I will fight the best I can. Doubtless I shall die on board Nagato. Meanwhile, Tokyo will be burnt to the ground three times. Konoe and others will be torn to pieces by the revengeful people….” He also would state after the fact, “Unlike the pre-Tripartite days, great determination is required to make certain that we avoid the danger of going to war.”
He further stated, seemingly understanding his potential enemy in a way other leaders in Japan did not, “Should hostilities once break out between Japan and the United States, it would not be enough that we take Guam and the Philippines, nor even Hawaii and San Francisco. To make victory certain, we would have to march into Washington and dictate the terms of peace in the White House. I wonder if our politicians [who speak so lightly of a Japanese-American war] have confidence as to the final outcome and are prepared to make the necessary sacrifices.”
Unfortunately for him, he wasn’t listened to, and was even in charge of the attack on Pearl Harbor that would bring about the result he feared.
And if you’re wondering here, he was not killed aboard his flagship as he predicted, but rather when the U.S. intercepted an encrypted transmission outlining Yamamoto’s plans to tour around the South Pacific inspecting his forces, and were thus able to shoot down his plane. Perhaps not such a bad death for a man who stated, “To die for Emperor and Nation is the highest hope of a military man. After a brave hard fight the blossoms are scattered on the fighting field… One man’s life or death is a matter of no importance. All that matters is the Empire. As Confucius said, “They may crush cinnabar, yet they do not take away its color; one may burn a fragrant herb, yet it will not destroy the scent.” They may destroy my body, yet they will not take away my will.”
In the end, thanks to Pearl Harbor, a drawn out war with the U.S., something the Japanese military brass had known they’d lose quite handily if it happened, is exactly what happened. And while nobody in Japan could have anticipated the end result of Nagasaki and Hiroshima, the overall outcome was inevitable from the start given the U.S. had no interest in a treaty.
But going back to the start of it all, while the Japanese were confident they could defeat the outnumbered and poorly-equipped colonial forces of Britain and the Netherlands, the U.S. Pacific Fleet posed a more formidable threat. And as alluded to, contrary to popular belief, the Pearl Harbour attack was never intended to permanently destroy the American Fleet but rather temporarily disable it, buying Japan enough time to win a short campaign of conquest, consolidate its gains, achieve its needed resource independency, eliminate Western influence in these regions, and finally negotiate peace from a stronger position.
As the home anchorage of the U.S. Pacific Fleet, Pearl Harbor, on the Hawaiian island of Oahu, was home to a large number of ships, with over 100 commissioned and auxiliary vessels being in or just outside the harbour on the morning of December 7, 1941. Most of the large capital ships – the main target of the Japanese attack – were berthed along the east shore of Ford Island in what was known as Battleship Row. These were the:
-
Pennsylvania-Class battleships USS Pennsylvania and USS Arizona
-
the Nevada-Class battleships USS Nevada and USS Oklahoma
-
the Tennessee-Class Battleships USS Tennessee and USS California
-
and the Colorado-Class Battleships USS Maryland and USS West Virginia
The Florida-Class Battleship USS Utah, which had been converted to a target ship and anti-aircraft gunnery trainer, was berthed on the west side of Ford Island opposite Battleship Row. The other large capital ships in the harbour that morning were the heavy cruisers USS New Orleans and San Fransisco and the light cruisers USS Raleigh, Detroit, Phoenix, Honolulu, St. Louis, and Helena. The protected cruiser USS Baltimore, built in 1888 and decommissioned in 1922, was serving as an immobile receiving hulk for new naval recruits at the time of the attack.
In addition to the capital ships, there were also dozens of smaller vessels in the harbour, including:
-
30 Destroyers
-
14 Minesweepers
-
12 Torpedo Boats
-
8 Minelayers
-
5 Tugs
-
4 Cargo Ships
-
4 Submarines
-
4 Seaplane Tenders
-
2 Destroyer Tenders
-
2 Oilers
-
2 Repair Ships
-
1 Submarine Tender
-
1 Ammunition Ship
-
1 Survey Ship
-
1 Hospital Ship
-
1 Coast Guard Cutter
-
and 1 Gunboat
With a few exceptions, most of the smaller vessels escaped destruction or major damage; indeed, so confident were the Japanese of their ability to negotiate a peace after securing their positions in the regions they were capturing that they completely ignored many areas of the harbour such as the oil storage tanks, Navy yard, and submarine base. However, many of these vessels played key roles before, during, and after the attack. For example, at 3:42 AM, the coastal minesweeper USS Condor spotted the periscope of a Japanese Ko-hyoteki-class midget submarine attempting to sneak into the harbour. Three hours later, the Wickes-Class destroyer USS Ward intercepted and sank the submarine, inflicting the first casualties of the Pacific War. But while this incident occurred more than an hour before the aerial attack began, the warning was not acted on.
Significantly missing from Pearl Harbour that morning were the Pacific Fleet’s three aircraft carriers. USS Saratoga was in San Diego picking up her air group, while USS Enterprise and USS Lexington were ferrying aircraft to the islands of Wake and Midway. This serendipitous absence would prove key to the success of U.S. naval operations early in the Pacific War.
But as for the attack, the Japanese First Air Fleet or Kido Butai, comprising the aircraft carriers Akagi, Kaga, Hiryu, Soryu, Hiryu, Shokaku, and Zuikaku – along with two battleships, three cruisers, nine destroyers, three submarines, and eight oil tankers – sailed from Japan on November 26, 1941 and sailed south towards the Hawaiian Islands. On the morning of December 7, the Task Force was less than 500 kilometres north of Oahu when its commander, Admiral Chuichi Nagumo, received a message revealing that diplomatic negotiations between Japan and the United States had failed and ordering him to proceed with the attack. The first wave of aircraft was launched at 6:10 AM and comprised 88 Nakajima B5N Kate torpedo bombers, 48 Aichi D3A Val dive bombers, and 41 Mitsubishi A6M Zero fighters. The bombers carried a combination of regular high-explosive bombs, armour-piercing bombs modified from naval artillery shells, and aerial torpedoes fitted with wooden fins to prevent them burying themselves in the mud of the shallow harbour.
Infamously, at 7:02 AM, the incoming Japanese aircraft were detected by a U.S. Army radar station at Opana Point. While the crew immediately notified headquarters, their warning was ignored, the Army mistaking the contact for a flight of Boeing B-17 patrol aircraft due to arrive that day. So the Japanese attack force carried on unopposed, reaching Oahu at 7:40 AM. At 7:48, the first wave attacked the Naval Air Station at Kaneohe Bay, destroying its force of long-range patrol aircraft. Five minutes later, the force’s leader, Commander Mitsuo Fuchida, sent the infamous radio signal Tora Tora Tora to the Naval Task Force. Incidentally, while this signal is usually translated as Tiger! Tiger! Tiger!, it was, in fact, a combination of two code letters – to and ra – indicating, respectively, that the attack had started and that complete surprise had been achieved. This was chosen since, at the time, Japanese military aircraft could only send Morse Code signals.
At 8:00 AM, the first wave reached the harbour, where they were first spotted by the crew of the battleship USS Utah, moored on the west side of Ford Island. The second and last ship of the Florida class, Utah was launched in December 1909 by the New York Shipbuilding Corporation and commissioned in August 1911. She measured 159 metres long, displaced 22,000 metric tons, had a top speed of 21 knots or 39 kilometres per hour and a main armament comprising ten 12-inch guns in five twin turrets and sixteen 5-inch guns in casemates or barbettes along both sides of the hull. Perhaps her most distinctive features when completed were her twin hyperboloid-shaped lattice masts standing fore and aft of the superstructure. A common feature on American battleships in the 1910s and 20s, lattice masts were designed to isolate delicate fire-direction equipment from the shock of the guns firing. However, they proved vulnerable to high winds, and by the 1930s were largely replaced by more robust tripod masts.
In 1914, Utah and her sister ship USS Florida participated in the U.S. intervention in the Mexican Revolution, sending landing parties ashore to occupy the city of Veracruz. And when the United States entered the First World War in 1917, Utah was stationed at Berehaven in Bantry Bay, Ireland to protect Allied shipping convoys against German U-boats and surface raiders. After the war, she participated in numerous training exercises and carried U.S. Army General John Pershing and President-Elect Herbert Hoover on goodwill tours of South America. In 1930, however, the United Kingdom, United States, France, Italy, and Japan signed the London Naval Treaty, which set limits on the tonnage of surface warships and submarines each nation was allowed to possess. As a result, in 1931 Utah was demilitarized, stripped of her main armament and fitted with radio-control gear to convert her into an unmanned target ship. Then, in 1935, she was fitted with multiple anti-aircraft batteries for training naval gunners.
The First Group of the attack force, comprising the 88 Kate torpedo and level bombers, initially headed for Utah, whose berth was usually occupied by an aircraft carrier. Upon realizing their mistake, most of the bombers broke off to find another target; however, six aircraft led by Lieutenant Nakajima Tatsumi decided to press home the attack. Of the six torpedoes launched, two struck Utah, causing her to rapidly flood and list to port. At 8:12, the ship rolled over and capsized, trapping 62 men inside her hull. The ship’s senior officer, Commander Solomon Isquith, swam ashore, gathered a group of volunteers and a cutting torch, and began cutting into the upturned hull in an effort to free the trapped sailors. In the end, they succeeded in rescuing 4 men. Among the 58 dead was Chief Watertender Peter Tomich, who remained belowdecks to keep vital machinery running while his fellow crew members abandoned ship. For his actions, Tomich received the posthumous Congressional Medal of Honor. Miraculously, despite the attack coming without warning, 461 of Utah’s 519 crew managed to escape the sinking ship.
Meanwhile, one of the torpedoes launched at Utah struck the nearby Omaha-class Light Cruiser USS Raleigh, launched in October 1922 at the Fore River Shipyard in Quincy, Massachusetts. On this shipyard, which constructed 5 of the ships then residing at Pearl Harbor, the Nevada, Raleigh, Detroit, Farragut, and Phelps, as an interesting aside, the shipyard was originally started by the oft’ forgotten sidekick of Alexander Graham Bell, inventor extraordinaire Thomas Watson, who helped invent the telephone. Flush with cash from his telephone work and patents, Watson started a farm near the Fore River in 1881, but failed at that venture, and instead switched to perfecting a steam engine he’d previously designed. After this failed to sell, he switched gears again and in 1885 founded the Fore River Ship and Engine company with businessman Frank Wellington, with their first ship made for the U.S. Navy constructed in 1896. Among countless others, the shipyard ultimately constructed 137 ships and 70 submarines for the U.S. Navy over the course of the next century, helping to make the U.S. the premiere naval power in the world.
Going back to the Raleigh, commissioned in February 1924, Raleigh was the fourth Omaha-class cruiser completed after USS Omaha, Milwaukee, and Cincinnati. Designed as a fast fleet scout, she measuring 169 metres long, displaced 7,600 metric tons, had a top speed of 35 knots or 65 kilometres per hour, and was fitted with a main armament comprising twelve 6-inch guns in two twin turrets and eight casemates and eight torpedo tubes. While the use of casemates was becoming old-fashioned by this point, the Omahas nonetheless had a variety of advanced features, including ammunition magazines placed below the waterline to improve survivability and propulsion machinery laid out in alternating boiler and engine compartments to prevent a single torpedo hit from immobilizing the ship – and for more on the history of the Fore River Shipyard and its surprising founder, please check out our previous video The Forgotten Other Guy Who Invented the Telephone and Helped Make the U.S. a Naval Superpower.
Raleigh’s first major action of the interwar period took place in February 1927, when she landed two detachments of U.S. Marines at Cortino, Nicaragua as part of the U.S. interventions in Central America collectively known as the “Banana Wars.” The following year she became the flagship for Vice Admiral John Dayton, Commander of Naval Forces in Europe. In September 1936, Raleigh was assigned to Squadron 40-T and, along with the destroyers USS Kane and Hatfield and the Coast Guard Cutter Cayuga, steamed to Gibraltar to evacuate hundreds of U.S. nationals fleeing the Spanish Civil War. Finally, in October 1939, she was made flagship of Destroyer Flotilla One of the Hawaiian Detachment and stationed at Pearl Harbor.
After being struck by the Japanese torpedo, Raleigh began listing severely to port. However, quick action by her crew, including counter flooding and the jettisoning of topside weight, prevented her from capsizing. Meanwhile, her antiaircraft gunners opened fire on the Japanese attackers, and were credited with shooting down five enemy aircraft. As with Utah, Raleigh’s crew of 458 was exceptionally fortunate, suffering only a handful of wounded.
The next warship to hit, however, was not so fortunate. USS Arizona was the second and last battleship of the Pennsylvania Class. Launched in June 1915 from the Brooklyn Navy Yard and commissioned in October 1916, Arizona, like her sister ship USS Pennsylvania, was the largest and most powerful battleship yet built for the U.S. Navy, outstripping the previous benchmark, the Nevada Class, by nearly all measures. 185 metres long, displacing 29,600 metric tons, and with a top speed of 21 knots or 39 kilometres per hour, Arizona had a main armament comprising twelve 13-inch guns in four triple turrets, twenty-two 5-inch guns in casemates, and two torpedo tubes. Unlike most warships of this era, whose hulls were covered in various thicknesses of light, moderate, or heavy armour, the Arizona adopted an “all or nothing” approach in which the most vital areas of the ship like the engines and boilers, command spaces, steering gear, and ammunition magazines were heavily armoured while everything else was given minimal protection. This arrangement was designed to provide an effective compromise between protection and weight.
Ironically, one of Arizona’s most advanced features prevented her from participating in the First World War. Though she was one the first U.S. battleships fitted with oil rather coal-fired boilers, coal was more abundant than oil in Europe, and so Arizona and many of her oil-fired sisters remained stateside during the conflict. In 1919, however, Arizona was among the warships chosen to escort President Woodrow Wilson’s ship, the SS George Washington, as he sailed to France to attend the Paris Peace Conference.
In 1929, Arizona underwent a complete modernization, being fitted with new boilers and turbines, tripod masts in place of her earlier lattice masts, and extra horizontal armour. The latter was designed to protect against the growing threat of aerial attack, though in the case of Arizona this was to prove tragically inadequate. Following this refit, Arizona performed a number of significant duties, such as carrying President Herbert Hoover on a vacation cruise in the Caribbean, participating in relief efforts following the 1933 Long Beach Earthquake in California, and serving as a filming location for the 1934 James Cagney film Here Comes the Navy. In May 1940, amid growing tensions between Japan and the United States, Arizona was assigned to the U.S. Pacific Fleet at Pearl Harbor as the flagship of Battleship Division One.
Though she was to become one of the most famous ships in U.S. naval history, Arizona wasn’t even supposed to be at Pearl Harbor at the time of the attack. Scheduled to sail for Puget Sound, Washington in November for overhaul, on October 22, while on maneuvers, Arizona was accidentally rammed by the battleship USS Oklahoma, opening a large hole in her port side. Consequently, on the morning of December 7th she was moored at Berth F-7 in Battleship Row awaiting repairs in dry-dock.
Shortly after 8:00 AM, while the ship’s color party was preparing to raise the flag, Arizona came under attack by ten Kate level bombers, which dropped armour-piercing bombs from an altitude of 3,000 feet. The aircraft scored four hits and three near misses. The first bomb ricocheted off Turret IV and penetrated the deck into the Captain’s pantry, starting a small fire; while the second and third hit the port edge of the ship near the mainmast and near the port aft 5-inch antiaircraft gun, causing minor damage. However, the fourth bomb, which struck at 8:06, penetrated the deck near Turret II and ignited the forward powder magazines, setting off a catastrophic explosion that destroyed much of the ship’s interior and caused the superstructure and turrets to collapse, tearing the ship in half. The devastated ship quickly settled to the shallow bottom of the harbour, where she burned for three days. 1,177 of Arizona’s 1,512 crew died in the explosion – around half of the total American lives lost in the Pearl Harbor attack. An enduring mystery remains as to what caused the explosion, as the Japanese bomb should not have been able to penetrate the thick armour over Arizona’s powder magazines. The leading theory holds that the bomb set off black powder saluting charges stored outside the magazine, and that a hatch accidentally left open allowed the flash from these charges to enter and set off the main charges. However, with much of the physical evidence obliterated and inaccessible, we may never know for sure.
Alongside Arizona that morning was USS Vestal, which was assisting with minor maintenance aboard the battleship. Among the oldest ships in the U.S. Navy at the time, Vestal was originally launched as a collier in 1909 before being converted into a repair ship. After first being hit by two bombs, the explosion of the Arizona literally swept the Vestal’s crew off her upper decks into the water. Among them was Commander Cassin Young, who swam back to the ship and, countermanding an order by another officer to abandon ship, told his men:
“Lads, we’re getting this ship underway.”
Despite burning oil from the Arizona setting the ship ablaze, at 8:45 Vestal’s crew cut free her mooring lines, fired up her boilers, and managed to sail free of the inferno. However, due to severe flooding, Commander Young decided to ground the Vestal at Aiea Bay, near Honolulu. Young received the Medal of Honor for his actions in saving the Vestal and, following his death at the Battle of Guadalcanal in 1942, had a Fletcher-Class Destroyer named after him. USS Cassin Young survived the war and is now a museum ship in Boston, Massachusetts.
Among the worst-hit ships in Battleship Row was the USS West Virginia. The third and final ship of the Colorado Class, West Virginia was launched in November 1921 by Newport News Shipbuilding in Virginia and commissioned in December 1923. 190 metres long, displacing 33,200 metric tons, and with a top speed of 21 knots or 39 kilometres per hour, the Colorado Class was virtually identical to the earlier Tennessee Class but with an upgraded main armament of eight 16-inch guns in four twin turrets. West Virginia’s pre-war career was unremarkable, though she participated in many fleet exercises whose lessons later proved invaluable in the Pacific War. In April 1940, she was transferred to the Pacific Fleet at Pearl Harbor.
Early in the attack, West Virginia was hit by seven torpedoes and two armour-piercing bombs, causing extensive damage and flooding. The ship was only prevented from capsizing by counter flooding initiated by the assistant fire control officer, Lieutenant Claude Ricketts. Meanwhile, at 8:20, USS Tennessee, moored alongside West Virginia, suffered two bomb hits. Though neither caused serious damage, fragments from one bomb mortality wounded West Virginia’s captain, Mervyn Bennion. Nonetheless, he remained at his post and continued to direct the ship’s defence until the end – an action which won him a posthumous Medal of Honor. However, perhaps the most famous member of West Virginia’s crew was mess attendant second-class Doris Miller, who helped carry wounded crew members to safety before being ordered to man an anti-aircraft gun. Despite having no training in gunnery, Miller obeyed the order and was credited with shooting down one Japanese aircraft – though eyewitnesses claim he shot down several more. For his actions, Miller received the Navy Cross – the first black U.S. Navy sailor to be so honoured. He later died aboard the escort carrier USS Liscome Bay when it was torpedoed by a Japanese submarine off the Gilbert Islands on November 24, 1943. Two U.S. Navy ships have been named after Doris Miller: a Knox-class frigate commissioned in 1973, and a Gerald R. Ford-class aircraft carrier scheduled to be completed in 2029.
Despite receiving only minor bomb damage to her turrets, USS Tennessee, berthed next to West Virginia, soon found herself engulfed in flames from West Virginia’s leaking fuel bunkers and the explosion of the Arizona. However, she was unable to flee, being trapped on all sides by West Virginia, Arizona, Maryland, and Oklahoma. Nonetheless, her crew managed to get the onboard fires under control, and her anti-aircraft gunners were credited with shooting down five enemy aircraft.
Also struck by multiple torpedoes was the USS Oklahoma. The second and last of the Nevada Class, Oklahoma was launched in March 1914 by the New York Shipbuilding Corporation in Camden, New Jersey and commissioned in May 1916. The first of the U.S. Navy’s Standard-type battleships, Oklahoma and her sister ship Nevada incorporated many modern innovations in warship design, including oil-fired boilers, all-or-nothing armour protection, and triple gun turrets, which allowed for a shorter hull and thicker armour protection for the same weight. Unlike her sister, however, Oklahoma was fitted with older triple-expansion steam engines instead of more modern steam turbines.
Like Arizona, Oklahoma was not sent to support the British Grand Fleet in the North Sea due to the unavailability of fuel oil. Instead, along with Nevada and Utah, she was assigned to Battleship Division Six, sailing out of Berehaven, Ireland, to protect Allied merchant convoys. In 1919, she joined Arizona in escorting President Wilson to France, and in October 1936 evacuated U.S. nationals from Spain along with USS Raleigh. By the mid-1930s, Oklahoma had become largely obsolete, but the terms of the 1922 Washington Naval Treaty and 1930 London Naval Treaty prevented the Navy from retiring her. She thus underwent a series of modernizations until it was finally decided to decommission her by May 1942.
Oklahoma was struck by nine torpedoes from the first Japanese wave, causing her to quickly roll over and settle on her side. 415 of her 1,398 crew were killed in the process. Meanwhile, her sister ship Nevada was hit by three torpedoes, but managed to correct her list, raise steam, and get underway – the only battleship to do so during the attack. This was largely thanks to the actions of Ensign Joe Taussig, the officer of the deck, who had ordered a second boiler lit that morning as part of a power-transfer procedure. With the ship’s commander, Captain Francis Scanland, ashore, Taussig took command of the ship and her anti-aircraft batteries. As Nevada crossed the harbour basin, she was attacked by Val dive bombers from the second wave, whose pilots hoped to sink her in the channel and block the entrance to the harbour. Six bombs struck the ship, causing extensive damage and further flooding. When it became clear that the ship was sinking, Nevada was ordered to ground herself in shallower water. With the help of the tug Hoga and the minesweeper Avocet, Nevada succeeded in beaching herself on a coral ledge at Hospital Point. Over the course of the attack, 50 of Nevada’s 864 crew were killed and 109 wounded, while her anti-aircraft gunners were credited with shooting down 5 Japanese aircraft.
Moored at the southeastern end of Battleship Row was USS California, sister ship of Tennessee. Launched in November 1919 from the Mare Island Naval Shipyard in Vallejo, California and commissioned in August 1921, California spent much of her pre-war career performing fleet exercises and goodwill tours – as well as serving as a testbed for experimental naval radar – before being sent to Hawaii to deter Japanese aggression. On the morning of December 7, 1941, California’s gunners were among the first to open fire on the Japanese attackers, but the ready ammunition was quickly expended and the magazines had to be unlocked to acquire more. This created a break in the firing that allowed two Kate bombers to hit the ship with torpedoes, causing massive flooding. Unfortunately, at the time of the attack, the ship was being readied for inspection, and most of her hatches and portholes had been left open. This allowed the flooding to spread rapidly, overwhelming the ship’s pumps. Over the next hour, the ship was also struck by several armour-piercing bombs from Val dive-bombers, one of which hit near the forward starboard casemate and penetrated into the interior, causing widespread damage. While other ships pulled alongside to help fight the fires and pump water from California’s hull, she eventually sank to the harbour bottom and had to be abandoned. In total, 104 of California’s 1,083 crew were killed and 60 wounded. Four – Jackson Pharris, Herbert Jones, Thomas Reeves, and Robert Scott – received the Medal of Honor for their actions during the attack.
Of the battleships at Pearl Harbor that morning, the only ones not to suffer major damage were USS Maryland and USS Pennsylvania. Maryland, moored between Tennessee, California, and Oklahoma, was struck by two armour-piercing bombs, causing minor damage and killing four members of her crew. Pennsylvania, meanwhile, was in dry dock undergoing repairs, along with the Mahan-Class destroyers USS Cassin and USS Downes. At around 8:00 AM, Kate torpedo bombers attempted to torpedo the dry dock gates and flood the dock, but were unsuccessful. This was followed by a high-level attack by Kates armed with high-explosive bombs, one of which pierced Pennsylvania’s boat deck and exploded inside her No.9 5-inch gun casemate. Another bomb detonated between Downes and Cassin, rupturing their fuel bunkers and starting a large fire. Shore personnel flooded the dry dock in an attempt to douse the flames, but as the burning oil rose to the level of the ships’ decks, it began setting off torpedo warheads and shells and the destroyer crews were forced to abandoned ship.
These were the greatest losses inflicted by the Japanese attack, though far from the only ones. Among the smaller vessels in the harbour that morning, the Brooklyn-Class Light Cruiser USS Helena was attacked by Kate torpedo bombers who mistook her for the USS Pennsylvania. One torpedo struck the ship’s starboard side, flooding one engine room and damaging wiring to the main and secondary armament. The blast also severely damaged the nearby minelayer USS Oglala, causing her to capsize. Soon, however, the Japanese realized their mistake and diverted away from Helena, while the cruiser’s antiaircraft batteries kept further attacks at bay.
Finally, the Mahan-Class Destroyer USS Shaw was in auxiliary floating drydock YFD-2 undergoing repairs to her depth charge launchers when the second Japanese wave arrived. Val dive bombers attacked the ship, with three bombs hitting her forward hull and starting fires. These quickly blazed out of control, forcing the crew to abandon ship. As with the Pennsylvania, Downes, and Cassin, shore crews attempted to flood the dry dock, but around 30 minutes after being hit, Shaw’s forward magazines went up in an enormous explosion, sinking the ship as well as the dock and the harbour tug USS Sotoyomo.
By 10 AM, the second Japanese wave had departed. Having lost the element of surprise, Admiral Nagumo decided not to launch a third wave, and the carrier task force headed for home. Concurrently with the attack, Japanese land forces launched invasions of Thailand, Malaya, Hong Kong, Wake Island, and Guam, defeating the defending British and American forces within a month. Over the next 5 months they overran Singapore, Burma, The Philippines, the Dutch East Indies, New Guinea, and the Solomon Islands, with the southernmost expansion of Japanese operations occurring in May 1942 when Imperial Navy midget submarines attacked Sydney Harbour in Australia.
From this lightning conquest of Southeast Asia and the Pacific, it is tempting to think that the attack on Pearl Harbor achieved its intended aims. But this was not the case. It is sometimes claimed that Admiral Yamamoto, who masterminded the attack, said afterward that:
“I fear all we have done is to awaken a sleeping giant and fill him with a terrible resolve.”
While there is no hard evidence Yamamoto ever actually said this, the sentiment is at least accurate, for the attack inflicted relatively little permanent damage and nearly all the ships sunk or damaged were eventually raised, repaired, and pressed back into service against the Japanese. But before this could happen, fires had to be put out, bodies recovered, and hulls re-floated – and that is a whole story unto itself.
Indeed, rescue and salvage work began even before the last Japanese aircraft left the harbour, such as when Commander Isquith of the Utah began cutting into his capsized ship’s hull to free trapped crewmen. Rescue work also immediately began on another capsized ship, the Oklahoma, several of whose crew made daring escapes through flooded, pitch-black compartments and passages to report the positions of other trapped men. Over the following day, rescue crews managed to cut free 24 survivors, though tragically two more were accidentally suffocated by the fumes from the cutting torches. But when the sun rose on the morning of December 8, the time came to step back and take stock of the damage.
The butcher’s bill was, to say the least, extensive. In less than two hours, the Japanese had sunk or severely damaged 18 ships including 9 battleships, 3 cruisers, and 4 destroyers; destroyed 188 aircraft on neighbouring airfields, and killed or wounded 3,581 American personnel. By contrast, the Japanese lost only 30 aircraft, two midget submarines, and 55 men. The attack had also left the harbour covered in a 2-inch layer of thick, sludgy bunker oil, much of which was on fire and would continue to burn for days following the attack.
Yet despite all this, there was a surprising amount of good news. As alluded to, in their zeal to sink the large capital ships, the Japanese had completely ignored much of the harbour’s support infrastructure, such as dry docks, oil tanks, maintenance shops, heavy-lift cranes, and the narrow-gauge railway used to move heavy equipment around the base. The latter was an especially lucky survivor; operated by the civilian Oahu Railway and Land Company, the railway never ran on Sundays, and on the morning of the attack all its engines were safely parked in the company’s main shed in Honolulu. Without this system and the rest of the harbour’s heavy equipment, the miracle of logistics that was about to unfold would likely have been impossible.
There was also more good news. Among the men present at Pearl Harbor on the morning of the attack was Lieutenant Commander Lebbeus Curtis. An expert in marine salvage, Curtis was en route to Eritrea in east Africa to help the British raise a number of ships sunk by the Italians. After the attack, however, he was retained in Hawaii to lead the salvage of the Pacific Fleet. By December 14 – one week after the attack – the cleanup operation had been organized into 10 divisions, including diving, ammunition retrieval, and salvage – with the latter division placed under the command of James M. Steele, former commander of the now-capsized Utah. An extensive triage was also performed to determine which ships could be salvaged and returned to service and which were beyond repair and would be cut up for scrap. Topping the latter category was the USS Arizona, whose catastrophic magazine explosion had demolished most of her forward section. Though some salvage work was done to recover her pay chest and rear gun turrets, Arizona was mostly left alone for the remainder of the war. USS Utah, which had been converted to a training ship and had no military value, was similarly placed at the bottom of the priority list.
By contrast, several ships had received only minor damage in the attack – namely the cruisers USS New Orleans, San Fransisco, and Honolulu and the battleships USS Tennessee and Pennsylvania – and could be made ready to sail in just a few days. New Orleans, which was undergoing engine maintenance at the time of the attack, sailed out of Pearl Harbor shortly thereafter to escort troop convoys to Palmyra and Johnston Atolls, running on three of her four engines. She then put in at San Fransisco on January 13, 1942 for the completion of repairs before returning to combat on February 12. Similarly, San Fransisco was undergoing a major overhaul to her machinery and was awaiting dry-docking to clean barnacles and other fouling from her hull. Following the attack, the engine work was rapidly completed and the de-fouling postponed to free up the dry docks for more urgently-needed repairs to other ships. On December 16, San Fransisco sailed from Pearl Harbor with Task Force 14 to relieve the besieged garrison on Wake Island. Slightly more damaged was USS Honolulu, which suffered a near-miss from a Japanese bomb that flooded several compartments. Nonetheless, repairs were completed in just a few weeks, and on January 12, 1942, Honolulu sailed from Pearl Harbor to escort a convoy to San Fransisco.
Perhaps the luckiest survivor of the Pearl Harbor attack was USS Pennsylvania, which was protected from Japanese bombs and torpedoes by the concrete and steel walls of Drydock 1. Having only suffered minor bomb damage to one of her guns, Pennsylvania was immediately removed from the dry dock to make way for Honolulu and sailed for San Fransisco on December 20. Over the following year, Pennsylvania participated in numerous training exercises and underwent extensive modernization work at the Hunter’s Point and Mare Island Naval Shipyards, receiving ten 40mm and fifty-one 20mm antiaircraft gun mounts, a new naval search radar, and a new secondary armament of sixteen 5-inch/38 calibre dual-purpose guns. Finally, in April 1943, she sailed north to support the invasions of Attu, Adak, and Kiska in the Aleutian Islands. From November 1943 onwards Pennsylvania participated in the U.S. military’s island-hopping campaign in the South Pacific, supporting the invasions of Makin Atoll in the Gilbert Islands; Eniwetok Atoll in the Marshall Islands; and Saipan, Tinian, and Guam in the Marianas. While she suffered no damage or casualties from enemy action during this period, on the night of June 10, 1944, Pennsylvania accidentally collided with the troopship Talbot, incurring minor damage.
In October 1944, Pennsylvania, along with the battleships USS Mississippi, Tennessee, California, Maryland, and West Virginia, were formed into Task Group 77.2 under the command of Admiral Jesse Oldendorf and performed shore bombardment in support of the invasion of the Philippines. On the night of October 24, a Japanese task force comprising the battleships Yamashiro and Fuso; the heavy cruisers Mogami, Nachi, Ashigara; the light cruiser Abukuma; and eight destroyers passed through Surigao Strait to engage Oldendorf’s ships, kicking of the Battle of Leyte Gulf – the largest single naval engagement of the war and among the largest in history. By the time the battle ended two days later, the Japanese had lost 28 ships including 1 fleet carrier, 3 light carriers, 3 battleships, and 10 cruisers. By contrast, the U.S. Navy lost only 12 ships – the largest being the light carrier USS Princeton. The engagement marked the end of the Imperial Japanese navy as a significant fighting force. While Pennsylvania did not directly engage any Japanese ships during the battle, her gunners succeeded in shooting down five enemy aircraft.
Pennsylvania next participated in the Battle Lingayen Gulf before returning to San Fransisco on March 13, 1945 for another overhaul. This involved further enlarging and upgrading her anti-aircraft armament to counter the growing threat of Kamikaze suicide aircraft. On July 24, she sailed again to participate in the invasion of Okinawa. On August 12 a Japanese torpedo bomber managed to penetrate the Allied defensive screen and launch its weapon at Pennsylvania, blowing a large hole in her stern and killing or wounding thirty of her crew. Thankfully, her crew were able to quickly bring the flooding under control, and the next morning the ship was towed to shallower water so further repairs could be completed. As it turned out, Pennsylvania would be the last major Allied vessel to be damaged by enemy action, for three days later on August 15, the Japanese surrendered, bringing the Second World War to an end.
Despite earning eight battle stars and a Navy Unit Commendation, after the war Pennsylvania was declared obsolete and selected as a target ship for Operation Crossroads, a series of nuclear weapons tests conducted at Bikini Atoll in mid-1946. The first test, codenamed Able, took place on June 30, with a 23-kiloton Fat Man bomb of the type used on Nagasaki being dropped on the target fleet by a Boeing B-29 Superfortress bomber. Unfortunately, the bomb missed the aiming point by nearly 650 metres; as a result, only five target ships were sunk. Pennsylvania was unaffected by the blast or radiation, and was soon re-boarded by her crew. The second test, codenamed Baker, took place on July 24, and involved an identical 23-kiloton device being detonated underwater beneath the target fleet. This time, ten ships were sunk. While Pennsylvania was only lightly damaged by the blast, the surge of highly-radioactive water thoroughly contaminated her hull and superstructure. On August 21, she was towed to Kawjalein Atoll, where, after being officially decommissioned, she was subjected to various radiological and structural studies. Finally, on February 10, 1948, she was towed off and scuttled off Kwajalein where she remains to this day. Nine days later, she was officially stricken from the Naval Vessel Register.
Going back to Pearl Harbor in December 1941, the next least-damaged ships were the light cruisers USS Raleigh and Helena, the battleship Maryland, and the destroyer USS Shaw. Raleigh was hit by a single torpedo and began to list severely to port, but was saved from capsizing by her crew jettisoning topside weight. In the days following the attack, preliminary repairs were affected by stuffing life preservers and cement into the torpedo holes and pumping the hull dry. On December 22, 1941, Raleigh was towed to the Navy Yard for further repairs, and on February 21, 1942 left Pearl Harbor as part of a five-ship convoy bound for San Francisco. She underwent a complete overhaul at Mare Island Naval Shipyard before sailing again on July 23 to escort supply convoys between San Francisco, Hawaii, Samoa, and the Fiji Islands. Then, from January 1943 to June 1944 she was stationed in the Aleutian Islands, performing shore bombardment for the invasion forces. This was to be the end of her combat career, for after suffering a failure in one of her engines on June 6, 1944, she put in again at Mare Island for repairs before transiting the Panama Canal to Annapolis, Maryland, arriving on July 1, 1945. She spent the next month and a half conducting midshipman training courses in the Caribbean until, on August 15, the Japanese surrendered. Declared obsolete, Raleigh sailed to the Philadelphia Naval Yard where she was decommissioned on November 2, 1945. She was struck from the Naval Vessel Register and sold for scrap on February 27, 1946.
USS Helena was similarly struck by a single torpedo, and was patched in two days before being tugged into Dry Dock 2, which was not expected to be ready until the spring of 1942 but was declared serviceable enough for preliminary repairs. As the concrete floor of the dock had not yet been poured, this task had to be completed in tandem with repairs to the Helena, leading to considerable friction between Navy and civilian workmen. Another complicating factor in Helena’s repair was the large volume of bunker oil which had drifted into the dry dock, which coated every surface and made work extremely dangerous. However, this provided an opportunity for workmen to perfect the high pressure water and steam-cleaning techniques that would prove vital to the subsequent salvage work around the harbour.
Preliminary repairs were completed by January 5, 1942, whereupon Helena sailed for Mare Island Naval Shipyard. There, her hull was fully repaired and new directors fitted for her 40mm antiaircraft guns. In late July 1942 she departed San Francisco, escorting a convoy of six transports, before joining Task Force 64 supporting U.S. landings on the island of Guadalcanal. On the night of October 11, Helena, along with the heavy cruisers USS San Francisco and Salt Lake City, the light cruiser USS Boise, and the destroyers USS Buchanan, Duncan, McCalla, Farenholt, and Laffey, detected and fired upon a Japanese squadron comprising the heavy cruisers Aoba, Kinugasa, and Furutaka and the destroyers Fubuki and Hatsuyuki. The Japanese, who had previously sunk four Allied heavy cruisers during the August 8 Battle of Savo Island, were not expecting the U.S. Navy to attack at night were taken completely by surprise. The ensuring engagement, known as the Battle of Cape Esperance, resulted in Furutaka and Fubuki being sunk and Aoba heavily damaged. On the American side, USS Duncan was sunk and Salt Lake City, Boise, and Farenhold heavily damaged. Though strategically inconclusive, the battle provided the US Navy with a much-needed morale boost.
A month later on November 13, Helena, now part of Task Force 67.4, participated in the Naval Battle of Guadalcanal, in which she engaged and lightly damaged the Japanese destroyers Akatsuki, Amatsukaze, Asagumo, Murasame, and Samidare. Over the first six months of 1943, Helena provided cover and shore bombardment for the invasions of New Georgia and of Kolombangara and Munda in the Solomon Islands. In the early morning hours of July 6, 1943, Helena, along with the light cruisers USS Honolulu and St. Louis and the destroyers USS Nicholas, O’Bannon, Radford, and Jenkins, were crossing the Kula Gulf in the Solomons when they detected and engaged a squadron of Japanese warships covering the landing of troops at Vila on Kolombangara. Having expended all her flashless propellant during the previous night’s shore bombardment, Helena was forced to use regular propellant, brightly illuminating herself whenever she fired. This allowed the Japanese destroyers Suzukane and Tanikaze to pinpoint the cruiser’s location and launch a salvo of eight torpedoes before fleeing the scene. Around 2:03 AM, three of these torpedoes struck Helena on her port side. She quickly broke into three pieces and sank, taking 168 sailors down with her.
One of the deceptively lucky survivors of the Pearl Harbor attack was the destroyer USS Shaw. Berthed in floating dry dock YDF-12 at the time of the attack, Shaw was struck by two bombs, starting fires that ultimately ignited her forward ammunition magazines. The resulting explosion, captured in one of the most iconic photographs of the Pearl Harbor attack, ripped the ship’s bow clean off. This proved to be something of a blessing in disguise, saving salvage crews the trouble of removing the damaged bow. Shaw was moved to Dry Dock 2, where preliminary repairs began on Christmas Day 1941. Her destroyed bow was replaced with a temporary welded-steel false bow, while her superstructure removed and replaced with a small tripod mast with a simple crow’s nest for her helm and navigation equipment. She was also stripped of her armament and given a single 5-inch gun from the destroyed USS Cassin to provide some measure self-defence. In January 1942 she was moved to the newly-refloated YDF-12 dock for final repairs before sailing for the Mare Island Naval Shipyard. There, she was restored to her original pre-attack configuration, returning to Pearl Harbor on August 31, 1942.
Shaw was first deployed to the Santa Cruz Islands to intercept enemy forces headed for Guadalcanal. Here, on October 26, she rescued the crew of the destroyer USS Porter, which had been torpedoed by a Japanese submarine. Then, on January 10, 1943, she accidentally ran aground while entering Nouméa Harbor, New Caledonia, forcing her to put into Pearl Harbor for extensive repairs. Returning to service in September 1943, she participated in Allied landings on New Guinea and New Britain before being damaged by Japanese dive bombers off Cape Gloucester, New Guinea, on December 26. She sailed for Hunter’s Point Naval Shipyard for repairs before returning to action on May 1, 1944. Over the next year, Shaw participated in the invasion of Guam and the Philippines before returning to San Fransisco on May 19, 1945 for major upgrades to her anti-aircraft batteries. However, by the time these upgrades were completed on August 20, 1945, the war had already ended. Shaw was declared obsolete, sent to Philadelphia for decommissioning, and sold for scrap in July 1946.
Of all the ships in “Battleship Row” on the east side of Ford Island, the least damaged was USS Maryland. “Least damaged”, however, is a somewhat relative term, for Maryland, having been hit by two armour-piercing bombs deep within her hull, was burning out pump after pump in an effort to control her flooding and stay afloat. She was also pinned against the upturned hull of the Oklahoma. Nonetheless, Naval tugs managed to extract Maryland from her berth and tow her into Dry Dock 2 just after the departure of Helena. Once her hull was rendered sufficiently seaworthy, she sailed for Puget Sound Naval Shipyard in Washington State, arriving on December 30, 1941. Here, she received permanent repairs to her hull as well as several design upgrades, including the replacement of her original secondary armament of 5 inch/25 calibre guns with 5-inch/38 calibre dual-purpose guns. Repairs were completed on February 26, 1942, and after a series of shakedown cruises Maryland returned to action in June 1942.
As an older battleship unable to keep up with the carrier task forces, Maryland was initially used in a supporting role, patrolling the American West Coast and Australia against Japanese incursions. However, in November 1943 she went on the offensive, performing shore bombardment during the invasion of Tarawa in the Gilbert Islands. She then supported the landings on Kwajalein in the Marshall Islands in January 1944 and on Saipan in the Marianas in May. On June 18, off Saipan, Maryland was struck by a torpedo dropped by a Japanese Mitsubishi G4M3 “Betty” bomber, which heavily damaged her starboard bow and killed two men. Steaming in reverse to avoid further damage, she sailed to Pearl Harbor for repairs, returning to duty on August 13. Her next action came on September 12 when she provided fire support for the invasion of Peleliu in the Palau islands.
Along with the battleships West Virginia, Mississippi, Tennessee, California, and Pennsylvania, Maryland participated in the decisive Battle of Leyte Gulf off the Philippines on October 24, 1944. A month later on November 29, however, she was struck by a Japanese Kamikaze aircraft between her No.1 and 2 turrets, causing extensive damage and inflicting 61 casualties – 31 of them fatal. Nonetheless, Maryland remained on station until relieved on December 2, arriving back at Pearl Harbor on December 18. Repairs were completed in time for Maryland to participate in the invasion of Okinawa, but on April 7 she was struck by another Kamikaze near her No.3 turret, igniting large fires, setting off antiaircraft ammunition, killing 10 crewmen and wounding 37. Once again, the ship remained on station for another week before sailing to Puget Sound, where the damage was repaired and the ship received extensive upgrades to her antiaircraft batteries and radar systems. However, just as with USS Shaw, by the time these repairs were completed, the war had already ended. Maryland’s final assignment was to ferry American servicemen back to the United States as part of Operation Magic Carpet. After completing five voyages, on April 15, 1946 she entered Puget Sound Naval Shipyard where she was decommissioned and placed in mothballs as part of the Pacific Reserve Fleet. Finally, in July 1959, she was stricken from the Naval Register and sold for scrap.
A similarly lucky survivor was Tennessee, which had only been struck by two bombs that failed to detonate and was largely seaworthy. Unfortunately, she was boxed in by Maryland ahead, West Virginia to the starboard, and Arizona astern, and had been showered in oil and set ablaze by the latter’s explosion. Thinking quickly, her crew had set her propellers to slow ahead to push away some of the burning oil, but recovery work was still delayed for several days by the thick pall of black smoke. Even worse, Tennessee was pinned against the quay by the partially-capsized West Virginia. It was thus decided to demolish said quay, after which Tennessee would be towed out rearward and spun through a 90-degree turn to clear the wreck of Arizona. Unfortunately, this proved more difficult than expected, the quay being so well-built that it required considerable amount of dynamite to demolish. But there was some good news: by the time this work was complete on December 16, Maryland had already been removed from her berth, allowing Tennessee to be more easily extracted.
After undergoing preliminary repairs to seal warped hull plates and loosened rivets, Tennessee sailed for Puget Sound on December 20, arriving 9 days later. There, she received more permanent repairs as well as several upgrades, including the replacement of her .50 calibre antiaircraft guns with more powerful 1.1 inch and 20mm models, the replacement of her 14-inch gun barrels with more modern versions, and the installation of new search and fire-control radars. Work was completed on February 25, 1942, whereupon Tennessee underwent a series of shakedown cruises and training exercises. Though slated to participate in the Guadalcanal campaign, Tennessee’s speed and fuel consumption were deemed unacceptable and instead she returned to Puget Sound for further modernizations, including the fitting of an entirely new superstructure, the replacement of her lattice masts with tripod masts, further upgrades to her anti-aircraft batteries, and the addition of additional deck armour, thicker anti-torpedo bulges, and improved hull compartmentalization.
Tennessee returned to service in May 1943 as part of the Aleutian Islands campaign, performing patrol, shore bombardment, and minesweeping duties in support of the landing forces. In the fall of that year she steamed to the South Pacific to support the island-hopping campaign, participating in the invasions of Tarawa, Kawjalein, Enewetok, New Ireland, Saipan, Guam, Tinian, Anguar, and Peleliu. On October 25, 1944, Tennessee, along with fellow battleships USS West Virginia, Maryland, Mississippi, California, and Pennsylvania, took part in the Battle of Leyte Gulf, where she helped to sink the Japanese battleship Yamashiro.
Following the battle, Tennessee returned to Puget Sound once more for a routine refit, being fitted with more sophisticated fire-control radars and a new paint scheme for greater protection against the emerging threat of Kamikaze aircraft. Work was completed on February 2, 1945, whereupon Tennessee sailed back into the Pacific to take part in the invasions of Iwo Jima and Okinawa. On April 12, Tennessee was hit by a Kamikaze, destroying part of her antiaircraft batteries, killing 25 of her crew, and wounding 104. Remaining on station for another two weeks, Tennessee finally sailed for Ulithi in the Caroline Islands for permanent repairs. She returned to Okinawa on June 3, providing shore bombardment until June 21 when the island was declared secure. Shortly thereafter, she became the flagship of admiral Jesse Oldendorf, who began preparing her and the rest of the fleet for Operation Downfall, the planned invasion of the Japanese home islands. She carried out patrols in the East China Sea, participating in raids in the Yangtze estuary and on Wake Island until August 15, when the Japanese finally surrendered. After covering the landing of occupation troops at Wakayama, Japan, in September, Tennessee sailed for the Philadelphia Navy Yard, arriving in December 1945. Her 1945 refit had left her hull too wide to fit through the Panama Canal, forcing her to take the long way home across the Indian and Atlantic oceans. Despite receiving 10 battle stars for her service during the war, like all her sister ships of similar vintage she was declared obsolete, decommissioned, and placed in mothballs. She remained in reserve until March 1, 1959, when she was finally sold for scrap.
But when it came to ships damaged at Pearl Harbor, this was where the good news ended. Though the Arizona and Utah were declared total write-offs and Oklahoma most likely so, California, Nevada, and West Virginia were considered salvageable – though salvage and repair crews would have their work cut out for them. Given Pearl Harbor’s limited drydock facilities, it was decided that only those repairs necessary to make the salvaged ships seaworthy would be performed; any work taking longer than a month would be performed at shipyards on the mainland. Other priority tasks included recovering as much ammunition and other sensitive equipment as possible from the ships’ hulls, recovering the Japanese midget submarine sunk just outside the harbour an hour before the aerial attack, and the removal and relocation of the ships’ antiaircraft guns to defend against a follow-up Japanese attack. So likely was this considered that many ships were surrounded with gunnery target barges with sheet metal and fencing welded on as makeshift anti-torpedo nets.
The first priority for salvage was USS California, which had been hit by two torpedoes and one armour-piercing bomb and quickly sunk to the harbour bottom so that only her superstructure and the top of her turrets were visible. Though she had settled on a relatively even keel, the mud beneath her was so soft that she soon began to list and appeared in danger of capsizing. Various chains and cables were strung between the ship and the quay in an attempt to forestall this, but unfortunately all of these failed. As a result, salvage priority was shifted to USS Nevada, though work still proceeded on the California at a slower pace. The first order of business was to remove her main armament in order to slow her inexorable descent into the mud. The next priority was patch the holes blown by the torpedoes, pump the hull dry, and re-float the ship so she could be towed into dry dock. Several methods were proposed to accomplish this, including plugging the holes with ice. But while this method had worked well in colder climes, it was understandably less than practical in the warm waters of Hawaii. Instead, it was decided to build a steel cofferdam around the ship, with the necessary pilings and other materials being ordered from the mainland. However, it soon became clear that this would quickly be swallowed up by the soft mud, so instead a number of smaller partial wooden cofferdams were erected around the hull over the sites of the torpedo hits and other breaches. The initial plan also called for the breaches to be filled with concrete cast against wooden forms, but this also proved unnecessary, with temporary wooden and metal patches proving just as effective. This, in turn, saved dry dock crews the considerable trouble of jackhammering away heavy concrete plugs.
But this process was anything but straightforward, with California providing a taste of the unique and often unpleasant challenges salvage crews would face while working aboard other, more severely damaged ships. Ruptured fuel tanks had released thousands of gallons of thick, sticky bunker oil, forcing every surface to be painstakingly cleaned with high pressure steam and water hoses before any work could begin. As this oil also coated the surface of the water inlayers up to two inches thick, Navy Divers sent down to map and measure hull breaches were forced to work in pitch darkness, navigating entirely by feel. But as unpleasant as this might have been, it was nothing compared to the situation inside the hull, where a mixture of oil, water, paper, meat, and human remains left to ferment for weeks in the tropical heat created a horrific environment beyond description. Beyond being revolting, this fermentation could be highly dangerous, such as on one occasion when a pocket of aviation fuel and hydrogen sulphide produced by fermenting organic matter ignited and caused a small explosion that injured 5 men and blew off several recently-installed hull patches. But on April 9, 1942, California was successfully re-floated and tugged into Dry Dock 2 for preliminary repairs. These were completed by October 10, whereupon California crossed the Pacific to the Puget Sound, arriving on October 20.
At Puget Sound California’s hull was more thoroughly repaired and fitted with thicker anti-torpedo blisters, which, like Tennessee, made her too wide to transit the Panama Canal. Her lattice masts, having already been removed at Pearl Harbor and repurposed as airfield signal towers, were replaced with tripod masts, while her superstructure was replaced with a new unit from a light cruiser which weighed one tenth as much as the original. This was to compensate for the 3 inches of additional armour fitted to her decks to protect against aerial bombs. Her anti-aircraft battery was also upgraded to the now-standard mix of forty 40mm and forty-three 20mm guns and her boilers replaced to maintain her original speed of 20.5 knots.
Unsurprisingly, all this work took a very long time, and it was not until January 1944 that California was finally ready to sail. Her first combat assignment was to Task Group 52.17, providing fire support for the invasion of Saipan along with her fellow vintage battleships USS Tennessee, Colorado, Maryland, Pennsylvania, Idaho, and New Mexico and seven of the newer fast battleships: USS Washington, North Carolina, Iowa, New Jersey, South Dakota, Alabama, and Indiana. On June 13, California received a hit from a Japanese 4.7-inch field gun, which disabled the ship’s search radar, started a fire, killed one crewman and injured 10. However, the damage was quickly contained. Shortly thereafter, she engaged a group of Japanese type 95 and 97 tanks heading towards the invasion beaches, scoring at least one hit with a 14-inch shell in what has to be the most extreme case of overkill in military history.
California next operated off Guam in June 1944 and Tinian in July. On August 23, she was accidentally rammed by USS Tennessee when the latter suffered a steering failure, and was forced to sail to the floating dry dock USS Artisan moored at Espiritu Santo in Vanuatu. Once repairs were completed, California sailed to the Philippines, where on October 24 she fired 63 shells against Japanese warships during the Battle of Leyte Gulf. In January 1945, while supporting the landings at Lingayen Gulf, California was simultaneously struck by a Kamikaze aircraft and a 5-inch shell from another ship attempting to shoot down said aircraft, starting a fire that left 45 dead and 151 injured. Returning to Puget Sound for repairs, California was further upgraded with an anti-aircraft battery composed of fifty-six 40mm and eighty 20mm guns before returning to duty in June 1945 in time to participate in the Battle of Okinawa. In early August she was sent to San Pedro Bay in the Philippines for maintenance, and it was here that her crew learned of the Japanese surrender. After supporting the landing of occupation troops at Wakayama, California sailed back to the United States the long way round, arriving in Philadelphia on December 7, 1945 – four years to the day since the fateful attack at Pearl Harbor. Declared obsolete, USS California was decommissioned on February 14, 1947 and placed in reserved until March 1, 1959, when she was finally sold for scrap.
Next on the Pearl Harbor salvage list was USS Nevada. Struck by one torpedo and five bombs, Nevada nonetheless managed to raise steam and get underway – the only battleship to do so. However, flooding proved more severe than expected due to bulkheads which had been breached and poorly sealed during a recent modification. To avoid sinking in and blocking the harbour channel, as mentioned, Nevada beached herself on a coral ledge at Hospital Point. Due to the harder seafloor, mapping and plugging the various hull breaches proved easier than with the California, though it still required divers to work in dark, oil-choked waters. Decomposition of organic material within the hull also caused problems, as on February 7, 1942 when two salvage workers were killed by the release of hydrogen sulphide gas from a sealed compartment. By February 13 the main torpedo breach in Nevada’s hull had been patched with a gigantic, custom-made wooden plug, and the ship was re-floated and towed into Dry Dock 2. After initial repairs, Nevada sailed for Puget Sound for more permanent repairs and upgrades. Originally, Nevada was to receive only minor upgrades and be relegated to secondary duties, but due to the urgent need for warships this was overruled and she instead received a new secondary armament of thirty-two 40mm antiaircraft guns, forty-one 20mm guns, and sixteen 5-inch/38 calibre dual-purpose guns. Her conning tower and mainmast were also cut down and her superstructure modified to include an open bridge and more spaces for radar and fire-control equipment. Upgrades were completed by October 1942, whereupon, after completing shakedown and training cruises, she was assigned to Task Group 51.1 in support of the Aleutian Islands campaign.
In June 1943, Nevada was sent to the Norfolk Naval Yard in Virginia for further modernizations – including the addition of a large search radar lattice to her mainmast. Then, unlike most of her sisters in the Pacific Fleet, was assigned to convoy escort duty in the Atlantic. However, the crippling of the German battleship Tirpitz by British midget submarines in September 1943 and the sinking of the battleship Scharnhorst in December greatly diminished the threat from surface raiders, and Nevada, along with USS Arkansas and Texas, was tasked with performing shore bombardment in support of the Allied landings in Normandy on June 6, 1944. Operating off Utah Beach near Azeville, Nevada fired 337 14-inch and 2700 5-inch shells during the first day of the landings. She later bombarded German gun positions near Cherbourg before being moved to the Mediterranean in support of Operation Dragoon – the Allied invasion of southern France. Operating off Toulon, Nevada, along with the American battleships USS Arkansas and Texas, the American heavy cruisers USS Augusta, Tuscaloosa, and Quincy; the British battleship HMS Ramillies, and the Free French battleship Lorraine, engaged in an extended gun duel with a German fortress nicknamed “Big Willie”, which was armed with the 13.4-inch guns salvaged from the scuttled French battleship Provence. While the duel was inconclusive, it succeeded in distracting the fortress from the landings taking place nearby. During the operation, Nevada was also credited with single-handedly neutralizing the Vichy French battlecruiser Strasbourg.
Following the success of Operation Dragoon, Nevada sailed to New York for another refit, during which the three guns from her No.1 turret were replaced by re-lined guns salvaged from USS Arizona. She then returned to the Pacific, where she performed shore bombardment off of Iwo Jima in February 1945 and Okinawa in March. On March 27, she was struck by a Kamikaze aircraft near her No.3 Turret, killing 11 men and wounding 49. On April 15, she was struck by five shells from Japanese 4.7-inch shore batteries, but suffered only minor damage. After being repaired, Nevada was placed in shore bombardment rotation for Operation Downfall, but the Japanese surrendered before she could be brought to bear. Nevada was present in Tokyo Bay during the formal surrender ceremony on September 2, 1945, after which she returned to the United States for decommissioning.
Like USS Pennsylvania, Nevada was selected as a target ship for the Operation Crossroads nuclear tests. Painted bright orange as the aiming point for the air-dropped Able test bomb, she survived unscathed when the bomb fell wide. She also survived the second Baker underwater bomb, but was severely contaminated by the radioactive surge. After being towed to Pearl Harbor and thoroughly examined, on July 31, 1948 she was towed out to a spot 65 miles southwest of Oahu and used as a gunnery target by the battleship USS Iowa and other vessels. Stubborn to the last, the “unsinkable” Nevada withstood pummelling by hundreds of shells, and finally had to be finished off with an aerial torpedo. Her wreck still lies where she sank at a depth of 15,400 feet.
The last battleship to be recovered from Pearl Harbor was the USS West Virginia. Struck by a withering combo of seven torpedoes and two armour piercing bombs, the ship quickly sank to the harbour bottom, settling on a mostly even keel but pinning USS Tennessee against the quay on Ford Island. The salvage of West Virginia was among the least pleasant of any of the ships at Pearl Harbor, as her sinking had trapped 70 men deep within her hull. Divers working to map torpedo holes and other hull breaches heard the trapped sailors tapping against bulkheads, but were powerless to rescue them as cutting through the hull might cause further flooding. Three of these men, Ronald Endicott, Clifford Olds and Louis Costin, survived for an incredible sixteen days in an airtight storeroom, marking off the days in grease pencil on the wall until finally running out of air. Yet despite these and other difficulties, West Virginia was patched and re-floated on May 17, 1942 and entered Dry Dock 1 on June 9. Following preliminary repairs, she sailed to Puget Sound in May for permanent repairs and upgrades.
West Virginia finally sailed again in the summer of 1944 – the last of the Pearl Harbor ships to return to service. After completing her shakedown cruises, she escorted the aircraft carrier USS Hancock to Task Force 58 before joining USS Maryland, Mississippi, Pennsylvania, California, and Tennessee as part of Task Force 77.2 during the invasion of the Philippines. During the Battle of Leyte Gulf, West Virginia fired 280 main battery rounds, but shortly thereafter ran aground and damaged her propellers, forcing her to put in at Spiritu Santo for repairs. While operating off Iwo Jima she received one hit from Japanese shore batteries which wounded one man, while on April 1 while off Okinawa she was struck by a Kamikaze aircraft, killing four men and wounding 7. Mercifully, the bomb aboard the aircraft failed to detonate. Following repairs, West Virginia sailed to the Philippines to train for the planned for the ultimately cancelled Operation Downfall. Like Nevada, West Virginia was in Tokyo Bay during the September 2 surrender ceremony, after which she returned to San Diego to take part in Navy Day celebrations on October 27. She next participated in Operation Magic Carpet, making three runs between Pearl Harbor and San Diego, before sailing to Seattle for decommissioning and assignment to the Pacific Reserve Fleet. After 14 years in mothballs, she was finally stricken from the Naval Register and sold for scrap on March 1, 1959.
The last noteworthy ships to survive the Pearl Harbor attack were the destroyers USS Cassin and USS Downes – though in this case “survive” is a somewhat relative term. Sharing Dry Dock No.1 with USS Pennsylvania at the time of the attack, Cassin and Downes were heavily damaged by near misses from aerial bombs, raging oil fires, and the explosion of their own shell and torpedo warheads. Yet while the ship’s hulls were quickly declared beyond repair, much of their machinery was recovered and sent to Mare Island, where brand-new ships were built around the salvaged parts and given the wrecked ships’ names and hull numbers. The resurrected Cassin and Downes participated in the invasions of Tinian, Luzon, Leyte, and Iwo Jima before being decommissioned in 1945 and sold for scrap in 1947.
It is difficult to overstate the sheer magnitude of the feat achieved by the Pearl Harbor salvage crews and their colleagues in the mainland shipyards. Thanks to their truly Herculean efforts, the Japanese attack on Pearl Harbor ultimately accomplished very little in material terms. Of the 18 ships sunk or severely damaged on December 7, 1941, only a handful were permanently knocked out of action. The rest were all successfully salvaged, repaired, and returned to service, serving with distinction throughout the rest of the war. It is a testament to the industrial might and national spirit of determination that ultimately secured total Allied victory over the Axis.
But the work at Pearl Harbor did not stop once the last re-floated ships sailed for the mainland. There were still three large battleship wrecks – Utah, Oklahoma, and Arizona – to contend with. The first priority among these three was Oklahoma, which, after being hit by four torpedoes, capsized and partially rolled into the harbour’s main channel, becoming a navigational hazard. Nonetheless, the recovery of ships that could be returned to combat was given top priority, such that salvage work on Oklahoma did not begin in earnest until July 1942. But before the ship could be pumped dry, re-floated, and towed away for scrapping, she first had to be righted. This was accomplished via parbuckling, wherein 21 tall steel derricks were fixed to the upturned hull and connected to elaborate systems of cables, pulleys, and electric motors sourced from streetcars in Honolulu and fixed to the shore on Ford Island. To reduce the ship’s weight and speed up the righting process, workers sealed internal compartments and blew them dry with compressed air and pumped the fuel bunkers free of oil. The winches were first activated on March 8, 1943, and the ship was upright by June 16. Cofferdams were then built around the hull so the torpedo breaches could be temporarily patched, and on November 3, 1943 Oklahoma was finally re-floated and towed out of the channel, entering the recently-completed Dry Dock 4 for more substantial patching on December 28. The wrecked battleship remained in storage at Pearl Harbor until May 1947, when she was finally towed out, bound for San Fransisco for scrapping. However, on May 17, the battleship and her two tugs encountered a violent storm 800 miles east of Hawaii, and Oklahoma snapped her tow cables and slipped beneath the waves. Her wreck has never been located.
Based on the success of the Oklahoma’s salvage, it was decided to recover Utah using the same parbuckling method. Ahead of this operation, a floating pier was built out from Ford Island to provide easier access to the hull, while divers were sent into the ship to recover ammunition and other useful equipment. Seventeen derricks were erected on the upturned hull, with the parbuckling operation commencing in February 1944. Unfortunately, the harbour floor beneath Utah proved softer than that beneath the Oklahoma, and instead of neatly righting itself, Utah kept slipping farther and farther away from the shore. As a result, the salvage operation was abandoned and Utah was left where she sank, now listing 37 degrees from the horizontal. She was stricken from the Naval Vessel Register on November 13, 1944, and, since some 900 men trapped within her hull were never recovered, declared a war grave. In 1989, both she and the Arizona were added to the National Historic Landmark registry. In 1950, a memorial was erected consisting of two plaques dedicated to the memory of the ship and her crew – one mounted on the wreck itself and one on the wharf on Ford Island. Then, in 1972, a larger memorial was erected in the form of a 70 foot walkway extending out from the wharf to the bow of the wreck. Unlike the more famous Arizona memorial, the Utah memorial is only accessible to individuals with military identification.
And finally, there was the Arizona, the most famous victim and enduring symbol of the December 7 attack. Stricken from the Naval Vessel Register on December 1, 1942, Arizona was left where she sank and underwent only minor salvage work, her main superstructure being removed and sold for scrap and her aft main gun turrets being recovered. The latter were reinstalled as part of Battery Arizona and Battery Pennsylvania, defensive positions on the Mokapu Peninsula covering the approaches to Kaneohe Bay. Battery Pennsylvania has the distinction of firing the last recorded shots of the Second World War, on August 14, 1945 – Victory over Japan Day. And, as we’ve previously covered, the guns from Arizona’s No.2 turret were recovered, relined, and later fitted to USS Nevada, who used them to great effect at Iwo Jima and Okinawa. Thus, in one of history’s great full-circle moments, Arizona, having received some of the first blows of the Second World War, delivered – in spirit, at least – some of the last.
Yet despite her historic status, after the war Arizona was largely ignored, left to slowly rust away off the northeast corner of Ford Island. It was not until 1948 that efforts began to erect some sort of memorial over the wreck. In that year, Robert Ripley, creator of Ripley’s Believe it or Not! made a radio broadcast from Pearl Harbor. Soon afterward, he wrote letters to Rear Admiral J.J. Manning of the Bureau of Yards and Docks expressing his desire for a permanent memorial. Though Ripley’s initial proposal was rejected on the basis of cost, the following year the Navy formed the Pacific War Memorial Commission. In 1950, Admiral Arthur W. Radford, commander of the Pacific Fleet, attached a flagpole to Arizona’s mainmast and assigned a color party to raise and lower a flag every day – a tradition that continues to this day. The following year he requested funds for a permanent memorial, but was denied due to the ongoing Korean War. The first permanent memorial, a 10-foot-tall basalt stone and plaque, was erected on Arizona’s deckhouse in 1955, while in 1958 President Dwight D. Eisenhower approved the creation of a National Memorial. $200,000 of the $500,000 budget was subsidized by the federal government and $50,000 by the Territory of Hawaii, while the remainder was privately raised by various means, including the sale of plastic models of the Arizona by the Revell Model Company and a March 25, 1961 benefit concert by Elvis Presley – his last live performance until 1968.
The Arizona memorial, designed by Austrian-born Hawaiian architect Alfred Preis, took the form of an 184-foot white-concrete bridge straddling the wreck, with a distinctive reverse arch or “sag” which Preis explained as follows:
“Wherein the structure sags in the center but stands strong and vigorous at the ends, expresses initial defeat and ultimate victory … The overall effect is one of serenity. Overtones of sadness have been omitted, to permit the individual to contemplate his own personal responses … his innermost feelings.”
Accessed by boat from the mainland, the memorial comprises three main parts: an entry, an assembly room with an opening in the floor through which visitors can view the wreck just below the surface, and a shrine with a marble wall bearing the names of the 1,177 men who lost their lives aboard Arizona on December 7, 1941. Unveiled on Memorial Day, 1962 and handed over to the National Park Service in 1980, the Arizona Memorial draws nearly 1.8 million visitors each year. Among the most famous sights encountered by visitors are the so called “tears of the Arizona” – the slow, steady leak of oil from the ship’s fuel bunkers, creating a permanent, rainbow-tinged slick trailing out from the wreck. With 500,000 gallons of oil estimated to remain within the wreck, it is likely that the Arizona will continue to shed its tears for decades to come – a poignant reminder of the Day of Infamy that forever changed the course of history.
Expand for References


| Share the Knowledge! |
|
 |